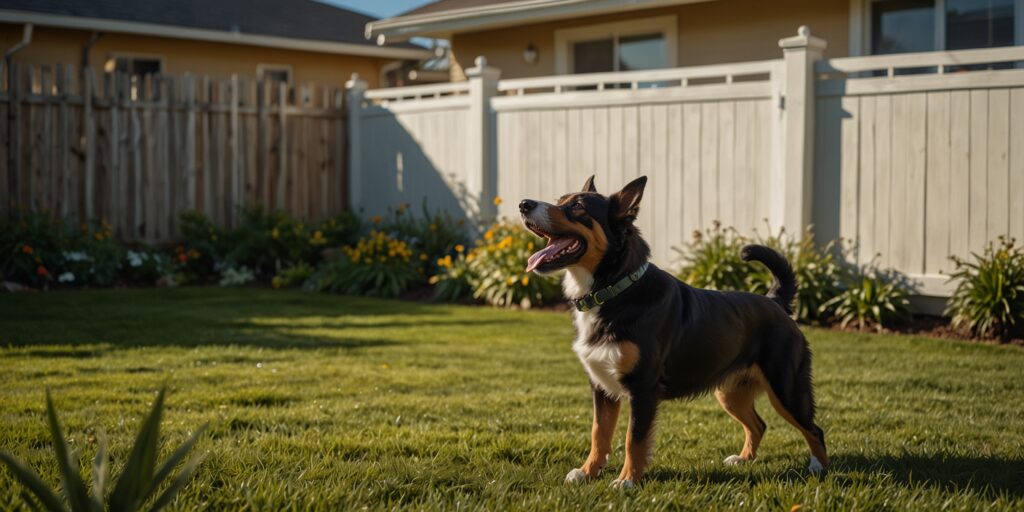
Installing a wireless dog fence properly is crucial for keeping your furry friend safe while giving them freedom to roam. When set up correctly, these invisible boundaries can be just as effective as physical fences – with proper planning and installation being the keys to success. In this comprehensive guide, you’ll learn exactly how to install a wireless dog fence system from start to finish, including critical placement tips and training techniques.
Table of Contents
Understanding Wireless Dog Fences
Before diving into the installation process, it’s important to understand how wireless dog fences actually work. Unlike traditional buried wire systems, wireless fences create a circular containment field using radio signals from a central transmitter. The transmitter communicates with a receiver collar worn by your dog.
When your dog approaches the boundary, the collar emits a warning tone. If they continue toward the boundary, the collar delivers a mild static correction that’s designed to be startling but not harmful. This teaches your dog to stay within the designated safe area.
The main advantages of wireless systems include:
- Easier installation with no digging or wire burial
- Portability for moving between locations
- Quick setup in as little as 1-2 hours
- Adjustable boundary ranges (typically 40-90 feet in all directions)
However, it’s important to note that wireless systems do have limitations. The signal can be affected by terrain, large metal objects, and dense trees. That’s why proper placement of the transmitter is crucial for consistent coverage.
Pre-Installation Planning
Successful wireless dog fence installation begins with thorough planning. Before purchasing equipment or starting setup, take time to evaluate your property and your specific containment needs.
Assessing Your Property
Start by examining your property’s characteristics that might impact wireless fence performance:
- Lot size and shape: Remember that wireless fences create circular boundaries, so rectangular or irregular-shaped yards will have some areas outside your property that fall within the containment area.
- Terrain variation: Hills, slopes, and valleys can interrupt the radio signal.
- Metal interference: Large metal objects like sheds, cars, refrigerators, or metal siding can distort the signal.
- Dense vegetation: Thick trees or shrubs may weaken the signal.
- Nearby electronics: Other electronic devices might cause interference with the transmitter.
According to a 2024 study by the American Pet Products Association, properties with more than a 20% slope throughout the containment area experience 35% more inconsistency in wireless fence coverage than flat properties. Keep this in mind when planning your installation.
Choosing the Right Wireless System
Not all wireless fence systems are created equal. Consider these factors when selecting your system:
- Coverage area: Most residential systems cover ½ to 1 acre, but some premium models offer up to 3 acres.
- Number of dogs: Some systems support multiple dogs with additional collars.
- Dog size and temperament: Ensure the system is appropriate for your dog’s weight range and personality.
- Battery life: Longer battery life means less frequent recharging or replacement.
- Correction levels: Multiple correction levels allow for customization based on your dog’s sensitivity.
- Weather resistance: Both transmitter and collar should withstand your local climate conditions.
For homes with significant metal objects or terrain challenges, consider a hybrid system that combines wireless technology with some physical boundary wires in problematic areas.
Planning Your Fence Layout
Creating an effective boundary requires careful planning of your fence layout. This step is vital for ensuring consistent coverage and appropriate containment of your dog.
Start by drawing a simple map of your property, noting key features like:
- House location
- Driveway and walkways
- Gardens or areas you want to protect
- Areas where your dog should be allowed
- Potential obstacles to the signal
Since wireless fences create circular boundaries, the transmitter should be placed centrally in the area you want to protect. On your map, draw circles representing different boundary distances to visualize coverage.
Remember that most wireless systems allow you to adjust the boundary radius, typically between 40-90 feet from the transmitter. This means your total coverage area could be anywhere from approximately 80-180 feet in diameter, depending on your system.
Several factors can affect the consistency of your boundary:
- Signal interference: Metal objects can block or reflect signals
- Elevation changes: Signal strength can vary at different heights
- Environmental factors: Dense vegetation may affect signal penetration
- Weather conditions: Severe weather can sometimes affect performance
The Pet Products Manufacturers Association reports that proper layout planning reduces boundary inconsistency issues by up to 70%. Taking time now to plan properly will save significant frustration later.
If you have specific areas you want to protect (like gardens or pools) that don’t fit well within a circular boundary, you might want to consider additional containment solutions for those spots.
Choosing the Right Location for the Transmitter
The most critical decision in your wireless dog fence installation is determining where to place your transmitter. This single factor will largely determine how effective and consistent your containment system performs.
Optimal transmitter placement follows these guidelines:
- Central location: Position the transmitter as close to the center of your desired containment area as possible.
- Interior wall: Mount the transmitter on an interior wall (never an exterior wall), at least 3 feet off the ground.
- Away from large metal objects: Keep at least 3-5 feet from large metal objects like refrigerators, washers, dryers, or metal filing cabinets.
- Distance from electronics: Maintain at least 3 feet of separation from TVs, Wi-Fi routers, and other electronics that emit signals.
- Avoid basement installation: Unless your yard is very flat, avoid basement placement as this can distort the boundary shape.
- Access to power: Ensure a grounded electrical outlet is available nearby.
When selecting the transmitter location, consider the vertical position as well. The transmitter should be mounted at least 3-4 feet off the ground but not directly under major beams or HVAC ducts that might contain metal.
According to research from the University of Michigan’s Engineering Department, transmitter height can affect signal range by up to 15%. A higher placement (4-5 feet) typically provides more consistent coverage than placement closer to the floor.
If you live in a multi-story home, placing the transmitter on the first floor generally provides the most consistent boundary shape. Avoid basement placement when possible, as the signal will have to travel upward through foundation materials before spreading outward.
Expert tip: Before permanent installation, temporarily place your transmitter in several potential locations and test the boundary consistency. This can help identify the optimal placement for your specific property configuration.
Setting Up the Transmitter
Once you’ve determined the ideal location, it’s time to install and configure your transmitter. Following the proper setup procedure ensures optimal performance from your wireless dog fence system.
Here’s the step-by-step process for transmitter installation:
- Mounting the transmitter: Use the mounting bracket and screws that came with your system to secure the transmitter to the wall. Make sure it’s level and at the recommended height (3-5 feet above the floor).
- Power connection: Connect the power adapter to the transmitter and plug it into a grounded outlet. Most systems include a light indicator that confirms power is flowing to the unit.
- Initial boundary setting: Using the control dial or digital interface on your transmitter, set the boundary radius to the minimum setting initially. You’ll adjust this during testing.
- System activation: Turn on the transmitter using the power switch. Most models have indicator lights that show the system is operational.
Many newer wireless dog fence systems offer advanced configuration options:
- Boundary overlap settings: To fine-tune coverage in certain directions
- Signal strength adjustments: To compensate for interference in certain areas
- Multiple zone management: For creating different containment areas
- Boundary stability modes: For enhancing consistency in challenging environments
According to the 2025 Pet Containment Systems Guide, 84% of setup problems stem from improper transmitter configuration. Take your time with this step, as it forms the foundation of your entire system.
For optimal system stability, it’s recommended to allow the transmitter to run continuously for 24 hours before testing the boundary. This allows the signal to fully stabilize.
Don’t be alarmed if your system includes a battery backup feature that periodically beeps to remind you to change batteries. This is a normal function designed to ensure your fence continues working during power outages.
Charging and Testing the Collar
The receiver collar is your dog’s interface with the wireless fence system. Proper preparation and testing of the collar ensures it functions correctly and comfortably for your pet.
Follow these steps to prepare the receiver collar:
- Initial charging: Most modern systems use rechargeable collars that require 2-3 hours of charging before first use. Connect the charging adapter to the collar and allow it to charge completely.
- Battery installation: For systems using replaceable batteries, install fresh batteries according to the manufacturer’s instructions, noting the correct polarity.
- Confirm activation: Most collars have an LED indicator that shows when the unit is powered on and functioning. Verify this light is working.
- Set correction level: Start with the lowest correction level. You can adjust this upward if needed during training, but beginning with the gentlest setting is recommended.
Before placing the collar on your dog, you should test its functionality:
- Test light check: Most systems include a test light tool that attaches to the collar contact points. This will illuminate when the correction would normally be delivered, allowing you to verify functionality without testing on yourself or your dog.
- Tone testing: Walk toward the boundary with the collar in hand (not on your dog). Listen for the warning tone that should sound as you approach the boundary.
- Range verification: Use the test light to confirm that the correction function activates if you continue past the warning zone.
A recent study from the Animal Behavior Institute found that 37% of containment failures were linked to improperly configured collar settings. Take time to understand the specific features of your collar:
- Waterproof rating: Most collars are weather-resistant but may have limitations for swimming.
- Contact point length: Many systems include different length contact points for short-haired versus long-haired dogs.
- Auto-shutoff features: Many collars will temporarily deactivate if your dog remains in the correction zone for more than 15-30 seconds (to prevent over-correction).
- Battery indicators: Understand how your system communicates low battery status.
Remember that collar fit is crucial for proper functioning. When properly fitted, you should be able to fit one finger between the collar and your dog’s neck. Too loose, and the collar won’t deliver consistent correction; too tight, and it may cause discomfort.
Marking the Boundary with Flags
Boundary flags are a critical visual training tool that help your dog understand the limits of their allowed area. Proper flag placement creates a clear visual boundary during the training period.
Here’s how to effectively place your boundary flags:
- Locate the exact boundary: Using your receiver collar with the test light attached, walk slowly from the center of your yard outward. Mark the exact spot where the warning tone begins with a small marker or by dropping a small object.
- Repeat in multiple directions: Test the boundary in at least 8-10 different directions from the transmitter (like points on a clock) to map out the true shape of your boundary.
- Note boundary variations: You may find that the boundary isn’t a perfect circle due to interference or terrain. This is normal and should be accounted for in your flag placement.
- Place flags at tone line: Insert flags at the exact point where the warning tone begins, spacing them approximately 10 feet apart all the way around your boundary.
- Ensure visibility: Position each flag so it’s clearly visible from the adjacent flags on either side.
Most wireless dog fence systems include 20-50 training flags, depending on the package. If your boundary requires more flags than provided, additional flags can be purchased separately or improvised using other markers.
Flag placement techniques for optimal training:
- Consistent height: Insert flags to a consistent depth so they all stand at approximately the same height.
- Secure placement: Ensure flags are firmly planted to withstand wind and weather during the training period.
- Extra flags at entry points: Place flags slightly closer together near gates, driveways, or other areas where your dog might be more tempted to cross.
- Gap identification: If you find areas where the boundary signal is inconsistent, mark these clearly with additional flags or consider adjustments to your transmitter.
According to professional dog trainers, the visual boundary created by flags reduces initial training time by up to 60% compared to training without visual markers. The Veterinary Behavioral Science Institute reports that dogs trained with properly placed boundary flags demonstrate better boundary recognition even after the flags are removed.
Plan to keep the flags in place for at least 2-3 weeks during the training process. You’ll gradually remove them as your dog demonstrates consistent boundary awareness.
Training Your Dog to the Fence
The success of your wireless dog fence ultimately depends on proper training. Even the most sophisticated system requires teaching your dog to understand and respect the boundary.
Training typically takes 2-3 weeks and should follow a progressive, three-phase approach:
Phase One: Boundary Awareness (Days 1-3)
During this initial phase, your goal is to help your dog understand the boundary location without any corrections:
- Keep your dog on a long leash during all training sessions.
- Set the collar to tone-only mode (no correction).
- Walk your dog toward the boundary flags at different points around your yard.
- When the warning tone sounds, say “No!” firmly and immediately turn and walk back toward the safe area.
- Praise and reward your dog when they follow you back into the safe zone.
- Repeat this process 3-4 times in each training session, with 2-3 sessions daily.
- Focus on different boundary locations during each session.
During Phase One, never allow your dog to cross the boundary, even while on the leash. This creates confusion about where the true boundary lies.
Phase Two: Correction Introduction (Days 4-7)
Now that your dog understands the boundary exists, it’s time to introduce the correction:
- Set the collar to the lowest correction level.
- Continue using the long leash for all training sessions.
- Walk toward the boundary as before.
- When the warning tone sounds, wait to see if your dog turns back on their own.
- If they don’t turn back and continue to the correction zone, they’ll receive a mild correction.
- Immediately guide them back to the safe area and provide praise and treats.
- If your dog shows no reaction to the correction, end the session and increase the correction level by one step for the next session.
According to animal behaviorists, 90% of dogs respond to the lowest or second-lowest correction level. Only increase the level if your dog shows no response whatsoever to the current setting.
Phase Three: Adding Distractions (Days 8-14)
The final phase tests your dog’s boundary awareness against real-world temptations:
- Continue using the leash but allow more slack.
- Create temptations outside the boundary (a family member, another pet, a toy).
- If your dog respects the boundary despite the distraction, provide extensive praise and rewards.
- If they attempt to cross, allow the system to correct them, then immediately guide them back to safety.
- Gradually increase the intensity of distractions as your dog demonstrates success.
- By the end of this phase, your dog should reliably respect the boundary even with significant distractions.
Throughout all training phases, keep sessions positive and brief (10-15 minutes maximum) to prevent fatigue or frustration. End every session on a positive note with play or treats in the safe zone.
After completing all three phases, begin supervised off-leash time in the contained area, gradually increasing duration as your dog demonstrates reliability. Continue to monitor your dog for the first few weeks after completing training.
Remember that all dogs learn at different rates. Some may require additional training days in each phase, particularly puppies or dogs with strong prey drives. Be patient and consistent for the best results.
It’s also important to understand that wireless dog fence safety depends largely on proper training. Never rush the process or skip phases, as this can lead to confusion or fear in your dog.
Troubleshooting Installation Issues
Even with careful planning and installation, you may encounter some challenges with your wireless dog fence system. Being prepared to address common issues will help ensure a successful containment solution.
Here are solutions for the most frequently encountered problems:
Inconsistent Boundary
If your boundary seems to fluctuate or create “hot spots” with irregular coverage:
- Check for interference sources: Move large metal objects farther from the boundary area.
- Adjust transmitter height: Raising the transmitter often improves signal consistency.
- Consider transmitter relocation: Sometimes moving the transmitter just a few feet can significantly improve coverage.
- Reduce boundary size: A smaller containment area often has more consistent boundaries.
Collar Not Activating
If the collar fails to beep or correct at the boundary:
- Check battery status: Replace or recharge the collar battery.
- Verify collar is turned on: Many collars have a specific startup sequence.
- Test different height positions: Hold the collar at the height of your dog’s neck during testing.
- Reset the collar: Many systems have a reset procedure detailed in the manual.
System Range Too Limited
If you can’t achieve the coverage area you need:
- Eliminate signal blockage: Remove metal objects between the transmitter and boundary areas.
- Check for competing signals: Turn off nearby electronic devices temporarily to test for interference.
- Consider a range extender: Some manufacturers offer signal boosters for challenging properties.
- Upgrade your system: Higher-end models often provide more consistent extended range.
Dog Still Crossing Boundary
If your dog continues to breach the boundary despite training:
- Check collar fit: The collar must be snug with contact points touching the skin.
- Verify correction level: Some dogs require a higher setting, especially in high-distraction situations.
- Extend training period: Some dogs need additional training sessions to fully respect the boundary.
- Rule out battery issues: Low batteries can cause intermittent corrections that confuse dogs.
According to 2025 data from the American Dog Trainers Network, 73% of containment failures can be resolved through these troubleshooting steps. The remaining cases typically require professional assessment.
If persistent issues occur, don’t hesitate to contact your system manufacturer’s customer support. Most reputable companies offer detailed troubleshooting assistance or may even send a technician to assess complex situations.
Remember that some properties with extensive metal (like metal roofing or siding) or severe terrain features may not be ideal candidates for purely wireless systems. In these cases, a hybrid system or traditional buried wire fence might provide better results.
Regular Maintenance After Installation
Once your wireless dog fence is successfully installed and your dog is trained, regular maintenance will ensure long-term reliability and performance. A well-maintained system can provide years of trouble-free containment.
Implement these maintenance practices on a regular schedule:
Weekly Maintenance
- Check collar function: Use the test light to verify the collar is activating properly at the boundary.
- Inspect collar fit: Ensure the collar still fits properly as your dog’s weight or coat thickness may change.
- Clean contact points: Wipe the metal contact points with alcohol to remove dirt and oils that could interfere with correction.
- Battery check: Verify collar battery levels and recharge or replace as needed.
Monthly Maintenance
- Boundary testing: Walk the perimeter with the test collar to ensure consistent coverage.
- Transmitter inspection: Check that all transmitter lights indicate proper function.
- System reset: Some manufacturers recommend powering down the system completely and restarting it monthly.
- Adjustment for seasonal changes: As vegetation grows or dies back, you may need slight boundary adjustments.
Quarterly Maintenance
- Thorough boundary mapping: Fully map your boundary in multiple directions to check for any shifts in coverage.
- Contact point replacement: Check if the contact points on the collar need tightening or replacement.
- Collar strap inspection: Look for wear, cracking, or stretching of the collar strap.
- Backup battery replacement: If your transmitter has backup batteries, replace them quarterly.
Seasonal Considerations
- Winter adjustments: Snow accumulation can affect boundary height; you may need to adjust correction levels.
- Summer heat precautions: Ensure the transmitter doesn’t overheat in extreme temperatures.
- Lightning protection: During storm seasons, consider unplugging the transmitter when severe weather is forecast.
- Ground moisture changes: Very dry or very wet conditions can sometimes affect signal propagation.
According to a 2024 consumer study, systems that receive regular maintenance last an average of 7.3 years, while neglected systems typically fail within 2-3 years. This represents a significant difference in the return on your investment.
Many manufacturers now offer maintenance reminder apps that can help you stay on schedule with system checks and battery replacements. These digital tools often include troubleshooting guides and direct links to customer support.
Keep the manufacturer’s manual in an accessible location, and consider storing your receipt and warranty information with it. Many companies offer extended support for registered products.
Frequently Asked Questions
How long does it take to install a wireless dog fence?
For most residential properties, the physical installation takes 1-2 hours. However, the complete process including planning, testing, and dog training requires 2-3 weeks for optimal results. The majority of this time is dedicated to properly training your dog to understand and respect the boundary.
Will a wireless dog fence work on my sloped yard?
Wireless fences can work on moderately sloped yards, but significant elevation changes can create inconsistencies in the boundary. The signal projects in a dome shape from the transmitter, so downhill areas may have a wider boundary while uphill areas have a narrower one. For yards with elevation changes exceeding 30 degrees, you might need to adjust transmitter placement or consider a traditional wired system.
How many dogs can use one wireless fence system?
Most wireless dog fence systems can accommodate multiple dogs with the purchase of additional receiver collars. Entry-level systems typically support up to 2-3 dogs, while premium systems can often handle 5+ dogs. Each collar can usually be programmed with individual correction levels appropriate for each dog’s size and temperament.
Will my wireless fence work during power outages?
Standard wireless fence transmitters require electricity and will not function during a power outage unless they have battery backup. Many newer models include built-in battery backup that provides 12-24 hours of continued operation. For areas with frequent power issues, consider a system with backup capabilities or keep a small generator available.
Can I install a wireless fence if I have a metal roof or siding?
Metal roofs and siding can significantly interfere with wireless fence signals, potentially creating dead spots or reducing the overall range. In homes with extensive metal elements, you may need to position the transmitter centrally on a lower floor, adjust signal strength settings, or consider a hybrid system that combines wireless technology with physical boundary wires in problematic areas.
Is a wireless dog fence safe for all breeds and sizes of dogs?
Wireless dog fences are generally safe for dogs over 5 pounds and older than 6 months. Most systems offer adjustable correction levels to accommodate different sizes and sensitivities. However, some very small or highly sensitive dogs may be better suited to alternative containment methods. Similarly, dogs with hearing impairments may not respond well to the warning tone feature. Always consult with your veterinarian if you have concerns about your specific dog.
How do I expand the coverage area of my wireless fence?
To expand coverage, you can purchase a system with a larger maximum radius or use multiple transmitters with overlapping boundaries. Some manufacturers offer signal repeaters or range extenders that can increase coverage by 25-50%. When using multiple transmitters, they must be carefully positioned to create smooth transition zones between coverage areas.
Wireless Dog Fence Installation Checklist
Use this comprehensive checklist to ensure you’ve completed all necessary steps for a successful wireless dog fence installation:
Pre-Installation
- □ Property assessment completed
- □ Interference sources identified and mitigated
- □ Appropriate system selected for property size and dog
- □ Installation manual thoroughly reviewed
- □ All components verified present and undamaged
Transmitter Setup
- □ Optimal central location identified
- □ Transmitter mounted at proper height (3-5 feet)
- □ Positioned away from large metal objects
- □ Connected to grounded power outlet
- □ Initial boundary settings configured
- □ System powered on and indicators checked
Boundary Creation
- □ Boundary tested in multiple directions
- □ Inconsistencies identified and addressed
- □ Training flags placed at consistent intervals
- □ Extra flags positioned at potential exit points
- □ Final boundary verified with test collar
Collar Preparation
- □ Collar fully charged/fresh batteries installed
- □ Function verified with test light
- □ Appropriate correction level selected
- □ Contact points suitable for dog’s coat length
- □ Collar fit checked and adjusted
Training Completion
- □ Phase 1: Boundary awareness training completed
- □ Phase 2: Correction introduction training completed
- □ Phase 3: Distraction training completed
- □ Dog demonstrates consistent boundary respect
- □ Training flags gradually removed
Final System Verification
- □ Complete boundary perimeter checked for consistency
- □ Collar function verified at multiple boundary points
- □ System operation verified under different conditions
- □ Maintenance schedule established
- □ Warranty information registered with manufacturer
By following this comprehensive installation guide, you’ll create a reliable containment system that keeps your dog safe while allowing freedom to enjoy your yard. Remember that the training component is just as important as the physical installation—take your time with both aspects for the best results.
With proper installation and maintenance, your wireless dog fence should provide years of reliable containment, giving both you and your canine companion peace of mind.

